Skip to content
Pad & Polish

GUIDES · Guides

How to Remove Swirl Marks

Swirls are thousands of tiny scratches, almost all of them installed during washing. Removing them is the easy part. Not reinstalling them is the point.

By Stephen V.Updated How we research
#ad

We earn a commission when you buy through our Amazon links, at no extra cost to you. It never affects our rankings, and we say so when the cheaper product is the better buy. How this works.

Swirl marks are the fine, roughly circular scratch web that shows up in direct sunlight or under a bright light and makes a car look hazy rather than deep. They are not a coating problem, a wax problem or a paint-quality problem. They are thousands of individual scratches in the clear coat, and they got there almost entirely from something touching the paint.

The uncomfortable part: the overwhelming majority were installed during washing and drying. Automatic car washes with rotating brushes are the most efficient swirl installers ever built, but a sponge and one bucket at home does the same job more slowly. Understanding that is the whole guide, because removing swirls takes an afternoon and preventing them takes a habit.

Confirm they are actually swirls

Wash and dry the car, then look at a panel in direct sunlight or under a tight-beamed light held at a raking angle. Overhead garage lighting hides them almost completely, which is why so many corrections look perfect indoors and disappointing outside — a cheap swirl-finder light solves that.

  • A fine web of circular scratches, uniform across the panel — swirls. This guide.
  • Straight parallel lines — usually from a drying towel or a brush-style wash. Same fix.
  • Individual scratches you can point at — see best compound for car scratches.
  • Dull, chalky, faded paint with no distinct marks — oxidation, not swirls. See best compound for oxidized paint.

Why filling them is a trap

A large share of "swirl remover" products contain fillers — oils and polymers that sit in the scratches and make them optically disappear. The car looks corrected the same afternoon. Then the fillers wash out over a few weeks and every swirl comes back, usually right after you told someone how good the product was.

Genuine removal is abrasive. A polish or compound levels the clear coat down until the bottom of the scratch becomes the new surface. That is permanent, and it is the only thing that is. The mechanism is worked through in polish vs compound.

The sequence that actually removes them

  1. Wash properly. Two buckets, grit guards, pH-neutral shampoo. You are about to spread whatever is left on the paint around with a spinning pad, so it needs to be genuinely clean — see best car wash soap for detailing.
  2. Decontaminate. An iron remover, then clay. Bonded contamination under a polishing pad becomes fresh scratches. Do the bag test — do you need to clay bar before polishing covers why this is not optional.
  3. Test on one small section. Least aggressive combination first: a polishing pad and a moderate compound. Paint hardness varies enormously between manufacturers, and the test section tells you what the rest of the car needs.
  4. Correct panel by panel.Work about a two-foot square at a time, keep the pad flat, use slow overlapping passes, and let the machine's weight supply most of the pressure. Full technique in how to polish a car step by step.
  5. Wipe and inspect. A residue remover clears the polishing oils that temporarily flatter a finish. Then inspect under your light. This step is what stops you doing an unnecessary fourth pass.
  6. Refine, if the paint is dark. A cutting step leaves haze of its own. A soft finishing pad and a fine polish clears it — mandatory on black and dark metallic, frequently skippable on white and silver. See best finishing pads.
  7. Protect immediately. Corrected clear coat is bare. A sealant or a ceramic coating goes on now, not next weekend.

Steps three through six are the job a detailer would quote you for as a cut and polish. If you want the process itself explained rather than the swirl-specific version — what each stage removes, what neither stage can touch, and how the number of stages changes a quote — what is a cut and polish covers it end to end.

By hand, or not at all?

Swirls cover the entire car, which is exactly what hand polishing is worst at. You can genuinely remove them by hand on a single panel with a lot of patience, and the technique is in how to polish a car by hand — but for a whole vehicle it is many hours of work with uneven results.

A dual-action polisher is the honest answer, and it is not an expensive one relative to what a shop charges for the same job once. Its pad free-spins and stalls under pressure rather than grinding, which makes it very difficult to damage paint with. The shortlist is in best car polisher for beginners.

Stopping them coming back

This is the part that matters, because the clear coat you spend removing swirls does not grow back and you only get to do this a handful of times in a car's life.

  • Never use an automatic wash with brushes. Not once. Everything else on this list is secondary to that one.
  • Two buckets with grit guards, always. One shampoo, one rinse. The single most effective habit available.
  • Rinse thoroughly before anything touches the paint. Every particle removed by water is one that cannot be dragged.
  • Straight lines, not circles. If you do introduce a mark, a straight one is far less visible than a circular one.
  • A proper drying towel, or a blower. Drying causes as many swirls as washing. See best microfiber towels for detailing.
  • Separate mitts for wheels and lower panels. Brake dust in a wash mitt is abrasive grit you then rub on your paint.
  • Consider a ceramic coating. It does not make paint scratch-proof, but a harder, slicker surface resists marring and releases dirt with less contact — which means fewer opportunities to swirl it. See best ceramic coating for cars.

How often can you do this?

Not often. Every correction spends clear coat permanently, and a car has a finite amount. A full swirl removal every few years on a well-washed car is sustainable; annually is not, and it points at a washing problem the polish is only treating the symptom of. The honest arithmetic is in will rubbing compound damage clear coat.

The short answer

Quick picks

#ProductBest forScorePrice
01
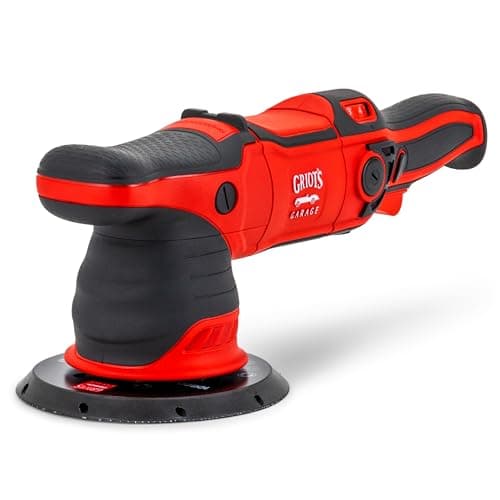
Griot's Garage Griot's Garage G9 Random Orbital Polisher
Griot's Garage G9 Random Orbital Polisher

The dual-action most enthusiasts would tell a beginner to buy: a smooth 9 mm orbit, a strong motor and a lifetime warranty, so it corrects real defects without the wobble cheaper units get under pressure.

A first polisher you won't outgrow
8.8
$179.99Amazon
02
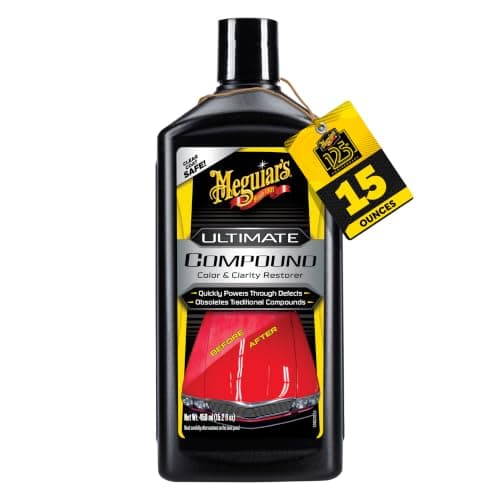
Meguiar's Meguiar's Ultimate Compound
Meguiar's Ultimate Compound

The compound to start with: clear-coat safe, works by hand or machine, and removes moderate swirls and oxidation while leaving a finish glossy enough that many people skip a follow-up polish.

Most swirl and oxidation removal, by hand or machine
8.6
$13.97Amazon
03
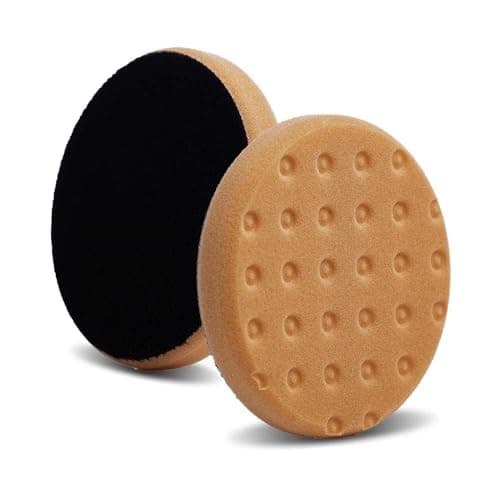
Lake Country Lake Country CCS 5.5" Foam Pads
Lake Country CCS 5.5" Foam Pads

The reference foam pad detailers reach for by default: the CCS dimple pattern meters product and reduces sling, and colors run a consistent, well-documented cut-to-finish scale.

The safe default foam pad on any DA
8.5
$26.76Amazon
04
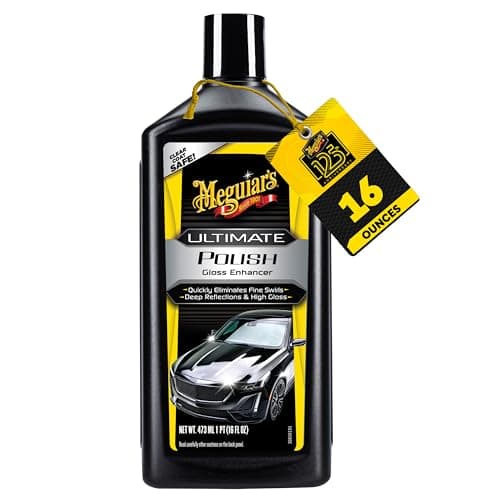
Meguiar's Meguiar's Ultimate Polish
Meguiar's Ultimate Polish

The gloss step, not a correction step: an extremely fine polish that darkens and deepens paint after compounding, which is exactly what black and dark-metallic finishes need before wax goes on.

The gloss pass after compounding, especially on dark paint
7.7
$9.67Amazon

#ad · Live prices from the Amazon Product API, as of Sep 4, 2026. Where we have no verified live price, we show none — we would rather leave a gap than print a number that has rotted.

In detail

The picks, in full

01
Griot's Garage Griot's Garage G9 Random Orbital Polisher

A first polisher you won't outgrow

Griot's Garage G9 Random Orbital Polisher

9 mm orbit1000 W motor6-speed dialLifetime warranty
8.8/10

The dual-action most enthusiasts would tell a beginner to buy: a smooth 9 mm orbit, a strong motor and a lifetime warranty, so it corrects real defects without the wobble cheaper units get under pressure.

Ergonomics
8.8
Correction power
8.6
Beginner-safe
9.2
Value
8.4

Pros

  • Enough torque to hold speed under pad pressure, where budget DAs bog down
  • Longer 9 mm orbit corrects faster than the old 5 mm entry tools
  • Griot's lifetime warranty is genuinely lifetime

Cons

  • Heavier than a bare-bones DA
  • Pads and compounds sold separately

Don't buy this if…

you only ever want to apply a spray coating — a cheaper spot polisher is plenty.

$179.99View on Amazon

Price as of Sep 4, 2026. Prices change — Amazon's is the one that counts.

#ad · we may earn a commission from this link to Griot's Garage G9 Random Orbital Polisher

02
Meguiar's Meguiar's Ultimate Compound

Most swirl and oxidation removal, by hand or machine

Meguiar's Ultimate Compound

Clear-coat safeHand or machineNo fillers15.2 oz
8.6/10

The compound to start with: clear-coat safe, works by hand or machine, and removes moderate swirls and oxidation while leaving a finish glossy enough that many people skip a follow-up polish.

Cutting power
7.6
Finishing ability
8.6
Ease of use
9
Value
9

Pros

  • Genuinely clear-coat safe and beginner-forgiving
  • Corrects moderate defects yet finishes down glossy
  • Works by hand when you don't have a machine

Cons

  • Not aggressive enough for deep scratches or heavy oxidation
  • Best results still need a machine

Don't buy this if…

your paint has heavy sanding marks or severe oxidation — step up to a dedicated cutting compound.

$13.97View on Amazon

Price as of Sep 4, 2026. Prices change — Amazon's is the one that counts.

#ad · we may earn a commission from this link to Meguiar's Ultimate Compound

03
Lake Country Lake Country CCS 5.5" Foam Pads

The safe default foam pad on any DA

Lake Country CCS 5.5" Foam Pads

5.5 inCCS dimpled foamColor-coded cutDA/rotary
8.5/10

The reference foam pad detailers reach for by default: the CCS dimple pattern meters product and reduces sling, and colors run a consistent, well-documented cut-to-finish scale.

Cut range
8.6
Durability
8.2
Finish quality
8.8
Value
8.2

Pros

  • CCS dimples hold product and cut sling and hopping
  • Color-to-aggressiveness scale is consistent and documented
  • Widely available in every cut level

Cons

  • Sold per-pair, so a full set adds up
  • Foam wears faster than microfiber on heavy cut

Don't buy this if…

you want maximum cut in one pass — a microfiber cutting pad removes more, faster.

$26.76View on Amazon

Price as of Sep 4, 2026. Prices change — Amazon's is the one that counts.

#ad · we may earn a commission from this link to Lake Country CCS 5.5" Foam Pads

04
Meguiar's Meguiar's Ultimate Polish

The gloss pass after compounding, especially on dark paint

Meguiar's Ultimate Polish

16 ozFine finishing polishHand or DAUse before wax or sealant
7.7/10

The gloss step, not a correction step: an extremely fine polish that darkens and deepens paint after compounding, which is exactly what black and dark-metallic finishes need before wax goes on.

Cutting power
3
Finish quality
9.2
Ease of use
9.2
Value
9.2

Pros

  • Adds visible depth to dark paint that compound alone leaves flat
  • Almost impossible to over-correct with — very low cut
  • One of the cheapest bottles in the whole category

Cons

  • Removes essentially no defects on its own
  • Adds a whole extra step to an already long job

Don't buy this if…

your paint still has swirls — compound first, then come back to this.

$9.67View on Amazon

$12.9926% off

Price as of Sep 4, 2026. Prices change — Amazon's is the one that counts.

#ad · we may earn a commission from this link to Meguiar's Ultimate Polish

How we picked

We do not run a testing lab

We compiled published specifications, manufacturer data sheets and aggregated owner reviews, computed the cost of ownership from real sizes and coverage, then scored each product against a published rubric. The scores are judgments from documented research — they are not measurements we took, because we do not own a lab and we are not going to pretend we do. Where a number came from someone else, we name them and link them in Sources.

Questions

Frequently asked

What causes swirl marks on car paint?
Almost always contact during washing and drying — automatic washes with rotating brushes, sponges, single-bucket washing, dirty drying towels and wiping dust off dry paint. They are thousands of fine scratches in the clear coat, not a fault in the paint.
Can you remove swirl marks without a machine polisher?
On one panel, with patience, yes. Across a whole car it is many hours of work with uneven results. Swirls cover every panel, which is exactly the case a dual-action polisher is built for.
Do swirl remover products actually work?
It depends whether they remove or fill. Products with abrasives genuinely level the clear coat and the fix is permanent. Products relying on fillers hide the swirls until the filler washes out, usually within a few weeks.
Will wax hide swirl marks?
Briefly. A wax film sits in the scratches and reduces how visible they are for a couple of weeks, then wears away and they reappear. Wax protects paint; it does not correct it.
How do I stop swirl marks coming back?
Never use a brush car wash, wash with two buckets and grit guards, rinse thoroughly before touching the paint, wash in straight lines, use a proper drying towel or a blower, and keep separate mitts for wheels and lower panels.
Does ceramic coating prevent swirl marks?
It reduces them rather than preventing them. A coating is harder and slicker than bare clear coat, so it resists light marring and releases dirt with less contact — but a brush wash will still mar it.

Keep reading

Receipts

Sources

We do not run a testing lab, and we do not pretend to. Where a measured number came from someone else's lab, we name them and link them. Where we could not verify something, we say so on the page rather than quietly leaving it out. Read our full method.