Skip to content
Pad & Polish

GUIDES · Guides

How to Remove Paint Transfer From a Car

That scuff from the garage door frame is someone else's paint sitting on yours. Removing it is usually easier than people fear — as long as you start at the gentle end.

By Stephen V.Updated How we research
#ad

We earn a commission when you buy through our Amazon links, at no extra cost to you. It never affects our rankings, and we say so when the cheaper product is the better buy. How this works.

Paint transfer is one of the few pieces of cosmetic damage that looks far worse than it is. When your car brushes a painted pole, a garage door frame or another vehicle's bumper, the softer of the two finishes leaves material behind on the harder one. What you are looking at is a deposit of foreign paint on top of your clear coat, not a groove cut into it. Deposits come off. Grooves have to be leveled out. That distinction decides everything about how much work this is.

First, prove it is transfer

Wash the area properly — a surprising amount of what looks like transfer is rubber, road film or wax residue and comes off with soap. Then run a fingernail lightly across the mark, at right angles to it.

  • Your nail glides over it and the mark feels raised or slightly rough — paint transfer sitting on the surface. Everything on this page applies.
  • Your nail catches in a groove — that is a scratch through your clear coat, and no amount of removing the transfer will make it disappear. You can take the foreign paint out of the groove and the groove stays. Compounds sorted by scratch depth is the honest next read.
  • Both at once — common on a real impact. Remove the transfer first, then assess what is left underneath. Almost every disappointing outcome in this job comes from grading the damage before the transfer is off.

The ladder: least aggressive first

Every step below removes more of your clear coat than the one above it. Work down the list, stop the moment the mark is gone, and re-inspect between steps — under a bright light, on a dry panel, not in a dim garage.

  1. Wash, then a detail spray and a plush towel. Very fresh, very light transfer sometimes wipes off with nothing more than lubrication and patience. Cheap to try, impossible to damage anything with.
  2. Clay, with far more lubricant than feels necessary. Clay shears material off the top of the paint, which is exactly what transfer is. Keep the surface genuinely wet, work in straight lines, and fold the clay to a clean face often. A dry or under-lubricated clay bar marrs the clear coat around the transfer, which turns one problem into two — the technique is covered in how to clay bar a car.
  3. A hand scratch-and-swirl remover, by hand, on a foam applicator. The first genuinely abrasive step, and the right one for a mark the size of your palm. Work a small area, wipe, look. Use a foam applicator rather than a folded microfiber, which concentrates all the pressure under three fingertips.
  4. A one-step compound, by machine, on a light-cut pad. For transfer over a larger area, or anything clay and hand work would not lift. This is ordinary paint correction and the usual rules apply: slow arm speed, overlapping passes, and stop to check.
  5. A finishing polish, to clear the haze. Any abrasive step leaves its own signature, and on dark paint that haze is more obvious than the transfer was. Budget this stage rather than discovering it.

The professional guidance on this is consistent and worth repeating: build the process from least aggressive to most aggressive, and expect to follow any clay or compound work with a polish and then re-protect the panel, because you will have removed whatever wax or sealant was there.

The household methods, honestly assessed

Autocomplete is full of these, so here is where each one actually stands.

  • Toothpaste. It is a mild abrasive, so it does technically work on very light transfer — and it is an uncontrolled abrasive of unknown grade, applied by hand, on a surface where abrasive grade is the whole ballgame. A four-dollar bottle of purpose-made scratch remover does the same job with a known cut level. There is no reason to reach for the bathroom cabinet.
  • Magic eraser or melamine foam. Avoid. Melamine foam is a micro-abrasive — that is how it works on walls — and on clear coat it leaves a uniform dull patch that then needs machine polishing to remove. It is one of the few household methods that reliably makes the panel worse.
  • WD-40 and similar penetrants. Harmless to clear coat in the short term and genuinely helpful as a lubricant on some fresh transfer, but it leaves an oily film that has to be removed with a panel wipe or a proper wash afterward. Do not wax or coat over it.
  • Lacquer thinner, acetone, brake cleaner. No. These attack clear coat as readily as they attack the transferred paint, and the damage happens faster than you can judge it. Body shops use solvents deliberately, in controlled ways, with the ability to respray the panel afterward. That is not the situation you are in.
  • Bug and tar remover. Reasonable to try after washing and before clay. It is formulated to be paint-safe and it softens some fresh transfer. Rinse it off thoroughly rather than letting it dwell.

Plastic bumpers deserve extra care

Most transfer happens at bumper height, and bumpers are the worst place to be aggressive. The paint film on a flexible plastic bumper is often thinner than on a steel panel, the shape is full of tight curves and edges where a pad concentrates its cut, and the plastic conducts heat away badly, so a machine can build temperature faster than you expect. Work bumper transfer by hand where you can, keep machine speed low, and never let a pad edge sit on a ridge.

Then protect the panel again

Clay, compound and polish all strip protection. A corrected patch left bare next to a waxed panel will look and behave differently within weeks. Re-wax or re-seal at least the whole panel, not just the repaired area — the picks in our wax roundup and the sealant shortlist both work for this.

Prices for everything below are live from the retailer and stamped with the date we verified them. Where we have no verified price we show none rather than a stale one.

The short answer

Quick picks

#ProductBest forScorePrice
01
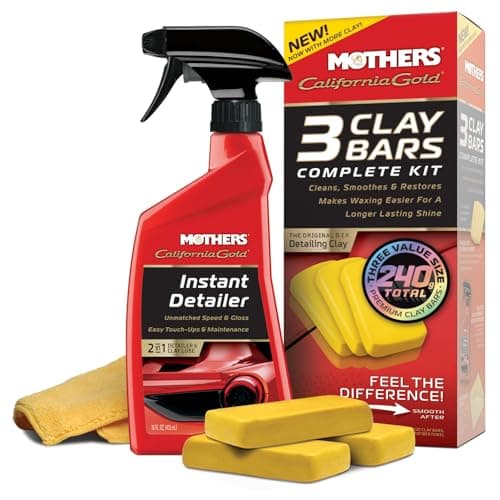
Mothers Mothers California Gold Clay Bar System
Mothers California Gold Clay Bar System

The lowest-cost way to learn claying: three mild bars plus detailer that safely pull bonded contamination off paint, and forgiving enough that a first-timer won't marr the finish.

A first clay job at the lowest cost of entry
8.4
$21.55Amazon
02
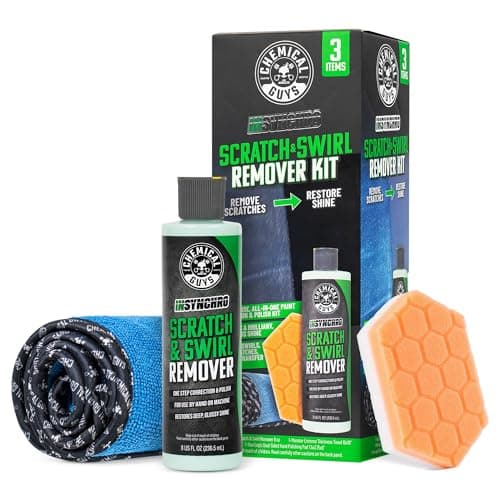
Chemical Guys Chemical Guys Insynchro Scratch & Swirl Remover Hand Kit (8 oz)
Chemical Guys Insynchro Scratch & Swirl Remover Hand Kit (8 oz)

A polish sold with the hand pad it is meant to be used with — which matters, because hand polishing fails far more often from the wrong applicator than from the wrong bottle.

Hand-correcting a single scratch or a small panel
7.8
$24.99Amazon
03
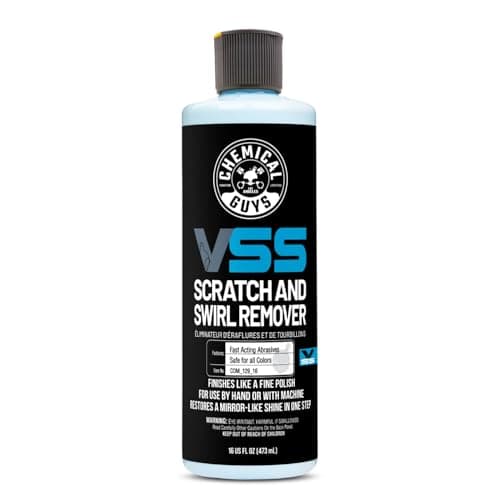
Chemical Guys Chemical Guys VSS One-Step Scratch & Swirl Remover
Chemical Guys VSS One-Step Scratch & Swirl Remover

A true one-step: it cuts light-to-moderate defects and then finishes with enough gloss to skip a separate polish, which is exactly what most weekend correction jobs need.

A one-and-done light correction step
8.0
$21.99Amazon
04
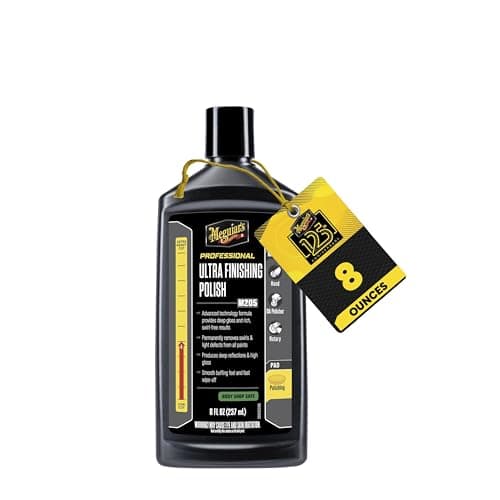
Meguiar's Meguiar's Professional M205 Ultra Finishing Polish
Meguiar's Professional M205 Ultra Finishing Polish

The professional finishing polish the whole hobby benchmarks against: it removes the haze a cutting compound leaves and finishes clear, with no fillers hiding what is still underneath.

The gloss pass after a cutting compound
8.1
$13.99Amazon

#ad · Live prices from the Amazon Product API, as of Sep 18, 2026. Where we have no verified live price, we show none — we would rather leave a gap than print a number that has rotted.

In detail

The picks, in full

01
Mothers Mothers California Gold Clay Bar System

A first clay job at the lowest cost of entry

Mothers California Gold Clay Bar System

Mild/fine clayThree 80 g barsIncludes detailerBeginner-safe
8.4/10

The lowest-cost way to learn claying: three mild bars plus detailer that safely pull bonded contamination off paint, and forgiving enough that a first-timer won't marr the finish.

Decontamination
7.6
Marring safety
8.8
Kit completeness
8.2
Value
8.8

Pros

  • Cheap, complete starter kit
  • Mild grade is forgiving on clear coat
  • Widely available

Cons

  • Mild bar is slow on heavy contamination
  • A dropped bar is scrap — though you get three

Don't buy this if…

the paint is heavily contaminated — a medium clay or a clay mitt works faster.

$21.55View on Amazon

$35.9940% off

Price as of Sep 18, 2026. Prices change — Amazon's is the one that counts.

#ad · we may earn a commission from this link to Mothers California Gold Clay Bar System

02
Chemical Guys Chemical Guys Insynchro Scratch & Swirl Remover Hand Kit (8 oz)

Hand-correcting a single scratch or a small panel

Chemical Guys Insynchro Scratch & Swirl Remover Hand Kit (8 oz)

8 ozHand polishing kitPad includedScratch and swirl removal
7.8/10

A polish sold with the hand pad it is meant to be used with — which matters, because hand polishing fails far more often from the wrong applicator than from the wrong bottle.

Cut
6.4
Finish
8
Ease of use
8.8
Value
8

Pros

  • Product and applicator are matched, so nothing is improvised
  • Small size suits spot repairs rather than whole cars
  • Works where a machine physically cannot reach

Cons

  • Hand correction is slow and covers very little area per hour
  • 8 oz will not do a whole car

Don't buy this if…

you own a dual-action polisher — the machine does this faster and better.

$24.99View on Amazon

Price as of Sep 18, 2026. Prices change — Amazon's is the one that counts.

#ad · we may earn a commission from this link to Chemical Guys Insynchro Scratch & Swirl Remover Hand Kit (8 oz)

03
Chemical Guys Chemical Guys VSS One-Step Scratch & Swirl Remover

A one-and-done light correction step

Chemical Guys VSS One-Step Scratch & Swirl Remover

One-step cut + finishMachine friendlyBody-shop safeLight–moderate cut
8.0/10

A true one-step: it cuts light-to-moderate defects and then finishes with enough gloss to skip a separate polish, which is exactly what most weekend correction jobs need.

Cutting power
7.4
Finishing ability
8.2
Ease of use
8.4
Value
8

Pros

  • Cuts and finishes in a single product and pass
  • Refines to a glossy finish, not a hazy one
  • Good on daily-driver defect levels

Cons

  • Not enough bite for heavy oxidation
  • One-steps compromise vs a dedicated cut + polish

Don't buy this if…

the paint is badly neglected — a two-step compound-then-polish will look far better.

$21.99View on Amazon

Price as of Sep 18, 2026. Prices change — Amazon's is the one that counts.

#ad · we may earn a commission from this link to Chemical Guys VSS One-Step Scratch & Swirl Remover

04
Meguiar's Meguiar's Professional M205 Ultra Finishing Polish

The gloss pass after a cutting compound

Meguiar's Professional M205 Ultra Finishing Polish

8 ozUltra-finishing polishBody-shop safePairs with M105
8.1/10

The professional finishing polish the whole hobby benchmarks against: it removes the haze a cutting compound leaves and finishes clear, with no fillers hiding what is still underneath.

Gloss
9.4
Cut
5.4
Ease of use
8.6
Value
8.8

Pros

  • Body-shop safe formula leaves nothing behind to mask defects
  • Long working time, so a panel does not dry out mid-pass
  • The other half of the most-documented two-step in detailing

Cons

  • Almost no cut — it will not remove swirls on its own
  • Professional-line packaging with no applicator included

Don't buy this if…

you want one bottle that both corrects and finishes.

$13.99View on Amazon

$16.8617% off

Price as of Sep 18, 2026. Prices change — Amazon's is the one that counts.

#ad · we may earn a commission from this link to Meguiar's Professional M205 Ultra Finishing Polish

What to buy for a transfer repair

Buy clay first if you own none

It is the cheapest item on the list, it removes no clear coat, and it resolves a large share of transfer on its own. It is also useful on every future decontamination, so it is not a single-purpose purchase. Our clay bar picks rank the wider field, and a kit with generous lubricant included is the right choice here, because under-lubrication is the main way this step goes wrong.

A hand kit beats a machine for one small mark

If the transfer is a single scuff the size of your hand, a hand scratch-and-swirl kit is both cheaper and safer than dragging out a polisher for one panel. Machines earn their keep on area, not on intensity. If the transfer covers a whole door, that flips — how to polish a car by hand sets out exactly where hand work stops being realistic.

Choose a one-step over a heavy compound

Transfer sits on the surface, so it does not need much cut to shift — what it needs is controlled cut applied carefully. A one-step scratch-and-swirl remover corrects and finishes in the same pass, which on a small repair means you may not need a separate polishing stage at all. Save the heavy compounds for what they are for; the field is in our cutting compound roundup.

Buy the finishing polish if the car is dark

On black and dark metallic paint, every abrasive step you take will be visible as haze until a finishing polish clears it. On silver and white you can often stop a step earlier. It is one of the few places where paint color genuinely changes the shopping list.

Do not buy a solvent

The temptation to solve this chemically is strong and it is where the expensive mistakes happen. There is no consumer solvent that removes automotive paint from automotive paint selectively, because it is the same class of material on both sides of the problem. Stay mechanical.
How we picked

We do not run a testing lab

We compiled published specifications, manufacturer data sheets and aggregated owner reviews, computed the cost of ownership from real sizes and coverage, then scored each product against a published rubric. The scores are judgments from documented research — they are not measurements we took, because we do not own a lab and we are not going to pretend we do. Where a number came from someone else, we name them and link them in Sources.

Questions

Frequently asked

How do you remove paint transfer from a car?
Work from least aggressive to most aggressive. Wash the area, try a detail spray and a plush towel, then clay the spot with plenty of lubrication, then a hand scratch-and-swirl remover on a foam applicator, then a one-step compound by machine if it is still there, and finally a finishing polish to clear the haze. Stop the moment the mark is gone, and re-protect the panel afterward.
Is paint transfer the same as a scratch?
No, and the difference decides how much work you are in for. Transfer is another object's paint deposited on top of your clear coat — it can be removed without damaging anything underneath. A scratch is a groove cut into your clear coat, and it only disappears when the surrounding clear is leveled down to the bottom of it. Run a fingernail across the mark: if it glides over, you are dealing with transfer.
Will a clay bar remove paint transfer?
Often, yes — clay shears material off the top of the paint, which is exactly what transfer is. The critical part is lubrication: keep the surface genuinely wet, work in straight lines, and refold the clay to a clean face frequently. A dry or under-lubricated clay bar marrs the clear coat around the transfer and turns one problem into two.
Does toothpaste remove paint transfer?
It can, on very light transfer, because toothpaste is a mild abrasive. It is also an abrasive of unknown grade applied by hand on a surface where grade is the whole ballgame. A purpose-made scratch-and-swirl remover costs a few dollars, has a known cut level and finishes better. There is no advantage to the household version.
Can I use a magic eraser on paint transfer?
No. Melamine foam is a micro-abrasive, which is how it cleans walls, and on clear coat it leaves a uniformly dull patch that then needs machine polishing to remove. It is one of the few household methods that reliably makes the panel worse than it started.
Should I use WD-40 or lacquer thinner on paint transfer?
WD-40 is harmless to clear coat in the short term and can help as a lubricant on fresh transfer, but it leaves an oily film you must remove before waxing or coating. Lacquer thinner, acetone and brake cleaner should be kept away from the car entirely — they attack your clear coat as readily as the transferred paint, and the damage happens faster than you can judge it.

Keep reading

Receipts

Sources

We do not run a testing lab, and we do not pretend to. Where a measured number came from someone else's lab, we name them and link them. Where we could not verify something, we say so on the page rather than quietly leaving it out. Read our full method.