Skip to content
Pad & Polish

HUB 03 · Compounds & Polishes

Best Headlight Restoration Kit

Nearly every kit will make a yellow lens clear for a weekend. Only some of them include the step that stops it going yellow again next summer — so that is the criterion we ranked on.

By Stephen V.Updated How we research
#ad

We earn a commission when you buy through our Amazon links, at no extra cost to you. It never affects our rankings, and we say so when the cheaper product is the better buy. How this works.

Buy the Sylvania Headlight Restoration Kit. It is the only kit here that carries both halves of the job in one box — a genuine three-grit sanding ladder at 400, 1000 and 2000 grit to remove the dead plastic, and a UV block clear coat to replace the protective layer the factory put on and the sun destroyed — and Sylvania backs it with a lifetime warranty for as long as you own the car. If your lenses have gone properly brown and you own a drill, the 3M Headlight Lens Restoration System (39008) cuts harder and faster than anything else on this page. If you want the absolute easiest route to a lens that stays clear, the Cerakote Ceramic Headlight Restoration Kit skips sanding entirely and finishes with a bonded ceramic clear coat.

The reason this page sorts kits the way it does is that most of them are sold on the wrong promise. The before-and-after photo on the box is easy; every kit on this page can produce it. What almost none of them tell you is that a restored lens with no new UV protection starts oxidizing again immediately, which is why so many people report their headlights going cloudy within a year of a kit that “worked perfectly.”

What is actually wrong with a yellow headlight

Modern lenses are not glass. They are polycarbonate, with a thin UV-resistant hard coat sprayed onto the outer face at the factory, and that hard coat is a consumable. Sun, engine-bay heat, road grit, salt and years of washing wear it away. Once it is gone, ultraviolet light starts breaking bonds in the polycarbonate itself, and the plastic hazes and takes on the yellow-to-brown cast everyone recognizes.

That oxidized material is now part of the surface. It cannot be washed, wiped or dissolved off, which is why every household trick disappoints. Restoring a lens means removing the dead outer layer mechanically and then refining the surface back to optical clarity — a paint correction run on plastic instead of clear coat, with the same ladder logic we use everywhere else on this site. The machine-and-compound route is covered in best polisher for headlight restoration; this page is about the all-in-one boxed kits.

How we ranked these

  • Does it include a UV protective step? This is the first filter and it eliminates more kits than anything else. A kit that finishes with a rubbing compound or a wax has restored the lens and left it naked. A kit that finishes with a UV block clear coat or a bonded ceramic layer has actually repaired it.
  • How much cut is in the box. Heavy brown oxidation needs a coarse grit — 400 or 500 — and then a ladder up through the middle grades. A kit whose coarsest abrasive is 1000 grit cannot clear a badly degraded lens no matter how long you work, and a kit with no abrasive at all can only remove the softest surface film.
  • Whether you need a drill. Drill-driven discs are faster and keep the cut even across a curved lens. They also overheat soft polycarbonate easily and exclude anyone who does not own a drill. Both routes are represented here and the ranking says which each kit is.
  • Enough material for the job, with a margin. Several kits contain exactly enough for one pair of lenses. One mistake and you are buying a second kit, so pack quantity is a real criterion rather than a footnote.

We have not stopwatch-tested these kits and we do not claim to have. Every pack list below is the manufacturer's own published contents, cited at the foot of the page, and the judgments are about what those contents can and cannot do.

The field, in one table

PickAbrasive ladderFinal protective stepDrill?
Sylvania Headlight Restoration Kit400 / 1000 / 2000 grit padsUV block clear coatNo
3M Lens Restoration System 39008500 + 800 grit, Trizact refiningRubbing compound onlyYes
Cerakote Ceramic Headlight KitPrep pad, no sandpaperBonded ceramic wipesNo
3M Auto Restore and Protect 391941000 + 3000 grit TrizactClear coat wipesYes
Meguiar's Two Step KitNoneStep 2 headlight coatingNo
Turtle Wax Headlight KitTwo-sided pad, no sandpaperCeramic acrylic wipesNo

Which kit matches your lenses

Start with a diagnosis, because the right kit is entirely a function of how far gone the plastic is. Wipe one lens with isopropyl alcohol on a clean towel. If the yellow lifts and the lens looks noticeably clearer while wet, you have surface film and a no-sand kit will handle it. If the color is still there with the lens wet, the oxidation is in the plastic, and only abrasives will take it out.

Light haze, no color.Meguiar's Two Step or the Turtle Wax kit. No sandpaper, no masking, ten minutes a light, almost no way to cause damage. Accept that you are buying a maintenance product rather than a restoration.

Yellow but smooth.The Sylvania kit, or 3M's 39194 if you own a drill and want to spend less. Both carry a mid-grit ladder and a real protective step, which is the combination that gets a clear lens that stays clear.

Brown, crazed or visibly rough. The 3M 39008 system. Six 500-grit discs and four 800-grit discs is a serious amount of abrasive, and heavy oxidation needs it. Then buy UV protection separately, because this kit does not include it — which is the one genuine flaw in an otherwise excellent box.

The step that decides whether it lasts

Sanding a lens removes the oxidized polycarbonate and the remains of the original hard coat together. What you are left with is raw, unprotected plastic that is, if anything, more exposed to UV than it was before you started. That is the whole story behind restorations that fail within a year.

Three of the kits here address it directly. Sylvania supplies a UV block clear coat and warrants the result for as long as you own the car. Cerakote finishes with pre-moistened ceramic wipes and claims the UV-blocking layer lasts as long as you own the vehicle. 3M's 39194 includes clear coat wipes, which is remarkable at its price. The 39008 system, by contrast, finishes with a rubbing compound — a polish, not a protectant — so plan on adding a clear coat or a ceramic wipe product on top of it.

If you only take one thing from this page: the protective step is not the optional finishing flourish. It is the repair. Everything before it is just preparing the surface for it.

Where these kits sit against doing it properly

A boxed kit is a compromise, and an honest one. A detailer restoring lenses works through wet-sanded grades with real sheets and a machine, then refines with a polish on a small pad, then applies a dedicated UV coating — which is more control and a better result than any box can give you. If you already own a polisher and abrasives, you may well be better served by proper wet sanding paper and a compound you already have than by buying another kit. The method carries over directly from paint: the ladder logic is the same one in what is a cut and polish, with a softer substrate and a much smaller panel.

What a kit buys you is that everything needed is in one box, matched, in the right quantities, with instructions. For one pair of lenses on one car, that is usually the right trade.

The short answer

Quick picks

#ProductBest forScorePrice
01
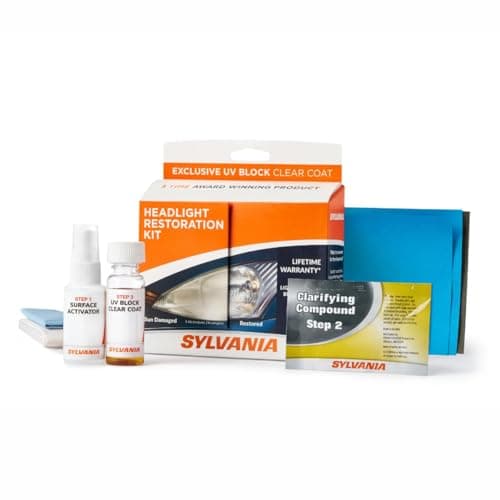
Sylvania Sylvania Headlight Restoration Kit
Sylvania Headlight Restoration Kit

The best-balanced kit in the field: a proper three-grit sanding ladder you run by hand, finished with a UV block clear coat, backed by a lifetime warranty for as long as you own the car.

The complete job without a power tool
8.6
$22.75Amazon
02
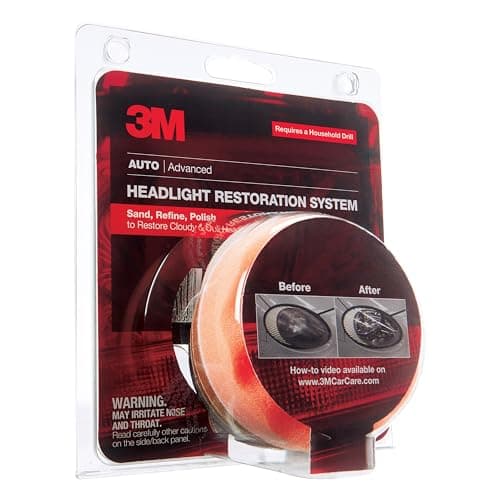
3M 3M Headlight Lens Restoration System (39008)
3M Headlight Lens Restoration System (39008)

The kit that treats a lens like a panel: a real abrasive ladder on a drill-driven disc holder, which is the only approach that clears heavy oxidation instead of polishing the top of it.

Heavily yellowed, badly oxidized lenses
7.5
$19.99Amazon
03
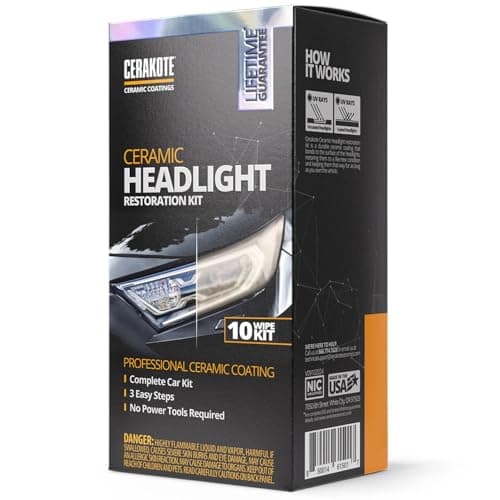
Cerakote Cerakote Ceramic Headlight Restoration Kit (10 Wipes)
Cerakote Ceramic Headlight Restoration Kit (10 Wipes)

The only kit here whose last step is a bonded ceramic clear coat rather than a wax — which is exactly the step that decides whether your afternoon's work lasts one summer or several.

Restoration that does not re-yellow next summer
8.8
$17.95Amazon
04
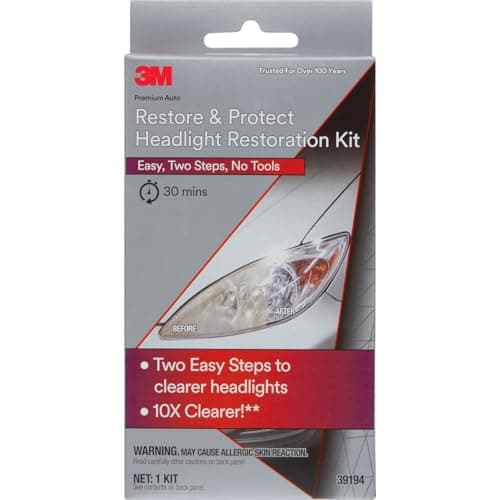
3M 3M Auto Restore and Protect Headlight Restoration Kit (39194)
3M Auto Restore and Protect Headlight Restoration Kit (39194)

The value pick of the whole category: two Trizact refining discs and two clear coat wipes, so you get the full sand-and-protect sequence for less than the price of a bottle of compound.

Moderate haze on a budget
8.4
$9.49Amazon
05
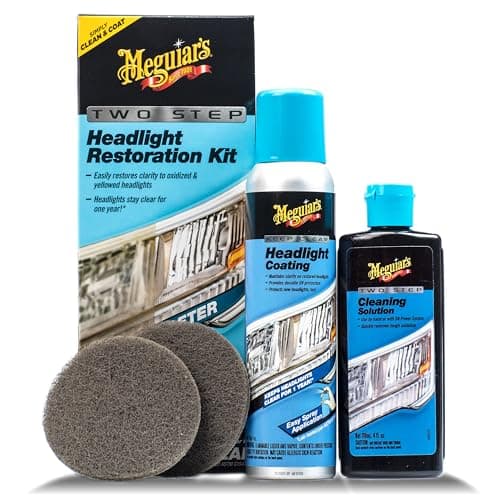
Meguiar's Meguiar's Two Step Headlight Restoration Kit
Meguiar's Two Step Headlight Restoration Kit

No sanding, no drill, no masking — a cleaning solution and a coating, which is the right answer when the lens is hazy rather than dead and you want it done before the kettle boils.

Light haze and a fast, low-risk job
7.9
$21.24Amazon
06
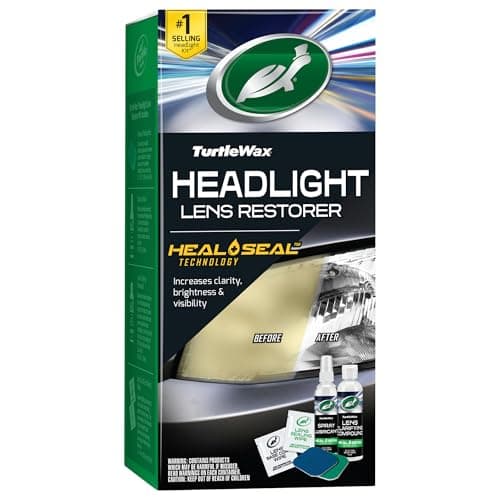
Turtle Wax Turtle Wax Headlight Restoration Kit
Turtle Wax Headlight Restoration Kit

The cheapest kit in the field that still finishes with a sealing step rather than nothing: a lens compound, a two-sided pad and two ceramic acrylic wipes for pocket money.

The lowest-cost way to try a restoration
7.6
$11.79Amazon

#ad · Live prices from the Amazon Product API, as of October 9, 2026. Where we have no verified live price, we show none — we would rather leave a gap than print a number that has rotted.

In detail

The picks, in full

01
Sylvania Sylvania Headlight Restoration Kit

The complete job without a power tool

Sylvania Headlight Restoration Kit

400 / 1000 / 2000 grit padsUV block clear coatSurface activatorCovers 2 lenses
8.6/10

The best-balanced kit in the field: a proper three-grit sanding ladder you run by hand, finished with a UV block clear coat, backed by a lifetime warranty for as long as you own the car.

Clarity restored
9
UV protection
9.2
Ease of use
7.4
Value
8.8

Pros

  • Carries both halves of the job — three sanding grades to remove the dead layer and a UV block clear coat to replace what the factory hard coat used to do
  • Sylvania backs the result with a lifetime warranty for as long as you own the vehicle, which no compound-only kit offers
  • Hand sanding pads mean no drill and far less chance of burning the plastic

Cons

  • Hand sanding a pair of lenses through three grits is 45 minutes of real effort
  • Sized for two headlight assemblies — no spare material if you make a mistake
  • The clear coat applicator is single-use and unforgiving: a run or a sag cures in place

Don't buy this if…

…you want this finished in ten minutes — the sanding stage is the price of the longer-lasting result.

$22.75View on Amazon

Price as of October 9, 2026. Prices change — Amazon's is the one that counts.

#ad · we may earn a commission from this link to Sylvania Headlight Restoration Kit

02
3M 3M Headlight Lens Restoration System (39008)

Heavily yellowed, badly oxidized lenses

3M Headlight Lens Restoration System (39008)

500 + 800 grit discsTrizact refining disc3.25 in disc pad holder1 oz rubbing compound
7.5/10

The kit that treats a lens like a panel: a real abrasive ladder on a drill-driven disc holder, which is the only approach that clears heavy oxidation instead of polishing the top of it.

Clarity restored
9.4
UV protection
5
Ease of use
6.8
Value
8.6

Pros

  • 3M's pack list is a genuine grit ladder — six 500-grit gold discs, four 800-grit white finishing discs, a Trizact refining disc and compound — so you can keep cutting until the oxidation is actually gone
  • Drill-driven discs do in minutes what hand sanding a lens half-finishes in an hour, and they keep the cut even across the curve
  • Enough abrasive in the box for both lenses with discs left over for a second car

Cons

  • You must own a drill — there is no hand path through this kit
  • Finishes with a rubbing compound and no UV clear coat, so the restored lens starts oxidizing again almost immediately unless you add protection yourself
  • A power tool on soft polycarbonate is genuinely easy to overheat; the margin for error is smaller than the box suggests

Don't buy this if…

…your lenses are only lightly hazed — this much cut is unnecessary, and a no-sand kit will do it with less risk.

$19.99View on Amazon

Price as of October 9, 2026. Prices change — Amazon's is the one that counts.

#ad · we may earn a commission from this link to 3M Headlight Lens Restoration System (39008)

03
Cerakote Cerakote Ceramic Headlight Restoration Kit (10 Wipes)

Restoration that does not re-yellow next summer

Cerakote Ceramic Headlight Restoration Kit (10 Wipes)

3 steps, no drillOxidation remover wipeSurface prep pad10 ceramic wipes
8.8/10

The only kit here whose last step is a bonded ceramic clear coat rather than a wax — which is exactly the step that decides whether your afternoon's work lasts one summer or several.

Clarity restored
7.8
UV protection
9.5
Ease of use
9.4
Value
8.4

Pros

  • Finishes with pre-moistened ceramic wipes that bond to the lens; Cerakote claims the UV-blocking layer lasts as long as you own the vehicle
  • No drill, no water, no masking — the whole job is a prep pad and wipes, which makes it the lowest-skill route to a good result
  • Ten wipes is enough for a set of headlights plus spares for taillights or fog lights

Cons

  • The prep pad is not a sanding ladder, so lenses with deep crazing or pitting will still look cloudy under the new clear coat
  • Wipes dry out once opened, so a part-used kit does not keep the way a bottle does
  • Costs more than the sand-and-compound kits that get a clearer lens on badly oxidized plastic

Don't buy this if…

…your lenses are deeply crazed or sandblasted — sand them clear first, then protect them.

$17.95View on Amazon

$19.9510% off

Price as of October 9, 2026. Prices change — Amazon's is the one that counts.

#ad · we may earn a commission from this link to Cerakote Ceramic Headlight Restoration Kit (10 Wipes)

04
3M 3M Auto Restore and Protect Headlight Restoration Kit (39194)

Moderate haze on a budget

3M Auto Restore and Protect Headlight Restoration Kit (39194)

1000 + 3000 grit Trizact2 clear coat wipes3 in foam padDrill-driven
8.4/10

The value pick of the whole category: two Trizact refining discs and two clear coat wipes, so you get the full sand-and-protect sequence for less than the price of a bottle of compound.

Clarity restored
8.2
UV protection
8
Ease of use
8
Value
9.4

Pros

  • The pack list includes headlight clear coat wipes, so the restored lens actually gets a protective layer — unusual at this price
  • Trizact at 1000 and 3000 grit leaves a fine, even pattern that clears with the wipes alone, so there is no separate compounding step
  • The cheapest complete restore-and-protect path we could verify anywhere

Cons

  • Starts at 1000 grit, which is not enough cut for heavy brown oxidation — that needs the 500-grit ladder in the 39008 kit
  • Two wipes covers one pair of lenses with nothing to spare
  • Needs a drill, and the single foam pad has to survive both lenses

Don't buy this if…

…the lenses have gone brown rather than hazy — you will sand all afternoon at 1000 grit and still see it.

$9.49View on Amazon

Price as of October 9, 2026. Prices change — Amazon's is the one that counts.

#ad · we may earn a commission from this link to 3M Auto Restore and Protect Headlight Restoration Kit (39194)

05
Meguiar's Meguiar's Two Step Headlight Restoration Kit

Light haze and a fast, low-risk job

Meguiar's Two Step Headlight Restoration Kit

No sanding requiredStep 1 cleaner, 115 mlStep 2 coating, 113 g2 application pads
7.9/10

No sanding, no drill, no masking — a cleaning solution and a coating, which is the right answer when the lens is hazy rather than dead and you want it done before the kettle boils.

Clarity restored
6.6
UV protection
7
Ease of use
9.6
Value
8.2

Pros

  • Genuinely two steps with no abrasives, so there is almost no way to damage the lens
  • Takes minutes per light instead of an hour, and nothing needs masking off
  • Enough product in both bottles for several cars, so it doubles as a maintenance kit for lenses you already restored

Cons

  • Without abrasives it can only remove the softest surface oxidation — a brown, crazed lens will stay brown
  • The step 2 coating is a protective layer, not a UV hard coat, so plan on repeating it yearly
  • Results on badly degraded plastic look better wet than they do once the lens dries

Don't buy this if…

…the yellowing survives a wipe with isopropyl — that is in the plastic, and only sanding takes it out.

$21.24View on Amazon

$24.9915% off

Price as of October 9, 2026. Prices change — Amazon's is the one that counts.

#ad · we may earn a commission from this link to Meguiar's Two Step Headlight Restoration Kit

06
Turtle Wax Turtle Wax Headlight Restoration Kit

The lowest-cost way to try a restoration

Turtle Wax Headlight Restoration Kit

No sanding requiredTwo-sided restoration padLens repair compound2 ceramic acrylic wipes
7.6/10

The cheapest kit in the field that still finishes with a sealing step rather than nothing: a lens compound, a two-sided pad and two ceramic acrylic wipes for pocket money.

Clarity restored
6.2
UV protection
6.4
Ease of use
8.8
Value
9

Pros

  • Costs less than a couple of coffees and still includes a sealing step most budget kits omit
  • The two-sided pad gives you a coarser and a finer face, so there is some cut available without loose sandpaper
  • Sold everywhere, so it is the easy fix before an inspection or a sale

Cons

  • Hand compounding is slow and the cut is mild — on a badly oxidized lens you will stop before it is clear
  • Two wipes and no spares means one mistake ends the job
  • An acrylic seal is a shorter-lived protective layer than a true ceramic or UV clear coat

Don't buy this if…

…both lenses are heavily oxidized — buy a kit with real abrasives rather than spending an hour for a partial result.

$11.79View on Amazon

Price as of October 9, 2026. Prices change — Amazon's is the one that counts.

#ad · we may earn a commission from this link to Turtle Wax Headlight Restoration Kit

Getting a lens clear and keeping it clear

Mask the paint before you touch the lens

Sandpaper does not know where the lens stops. Two passes of masking tape around the headlight surround takes a minute and prevents the one mistake on this job that costs real money — sanding into the paint on the fender or hood edge. Several kits include tape for exactly this reason.

Sand wet, and keep it wet

Polycarbonate loads sandpaper quickly and heats up fast. Keep the lens and the paper wet throughout: it clears the swarf, keeps the cut consistent and stops the surface melting under a drill-driven disc. A spray bottle beside you is not optional.

Finish each grit completely before moving up

The lens should look uniformly hazy, with no streaks of a coarser pattern, before you step up a grade. A deep 400-grit scratch left behind will still be there after the 2000-grit pass, and it will be the one thing you see in the clear lens afterwards. This is the same discipline that governs paint correction and the same reason people get poor results without it.

Degrease before the protective step

A clear coat or ceramic wipe will not bond through sanding residue or the oils from your fingers. Wipe the lens with isopropyl alcohol and let it flash off completely, then do not touch the surface again before the protectant goes on.

Apply the clear coat in one wet pass

The applicators supplied with these kits are single-use and the coating cures where you put it. One steady, overlapping pass across the lens, no going back over a section that has started to set, and no second coat unless the instructions call for it. A sag that cures in place has to be sanded out and redone.

Then protect it on purpose, every year

Even a UV clear coat benefits from a sacrificial layer over it. A ceramic spray or a graphene spray on the lenses when you do the paint takes thirty extra seconds — the field is ranked in best graphene coating — and a lens that gets topped up is a lens you will not be restoring again.
How we picked

We do not run a testing lab

We compiled published specifications, manufacturer data sheets and aggregated owner reviews, computed the cost of ownership from real sizes and coverage, then scored each product against a published rubric. The scores are judgments from documented research — they are not measurements we took, because we do not own a lab and we are not going to pretend we do. Where a number came from someone else, we name them and link them in Sources.

Questions

Frequently asked

What is the best headlight restoration kit?
The Sylvania kit, because it is the only one that carries a full three-grit sanding ladder and a UV block clear coat in the same box, with a lifetime warranty behind it. For heavy brown oxidation, 3M's 39008 system cuts harder; for the least effort, Cerakote's ceramic kit skips sanding entirely.
Do headlight restoration kits really work?
Yes, at making a lens clear. The failure is in what happens next: kits that finish with a compound or a wax leave raw polycarbonate with no UV protection, and it re-yellows within a year or so. Kits with a UV clear coat or a bonded ceramic step are the ones whose results last.
How long does a headlight restoration last?
It depends almost entirely on the final step. A compound-only restoration can start hazing again within a season of sun. A kit with a UV block clear coat or a bonded ceramic layer should hold for years — Sylvania warrants its result for as long as you own the car, and Cerakote claims the same ownership-length UV protection.
Do you need a drill for a headlight restoration kit?
Not necessarily. The 3M systems here are drill-driven; the Sylvania, Cerakote, Meguiar's and Turtle Wax kits are all done by hand. A drill is faster and keeps the cut even on a curved lens, but it also overheats polycarbonate much more easily.
Can you restore headlights without sanding?
Only if the yellowing is surface film rather than oxidized plastic. Wipe the lens with isopropyl alcohol: if it looks much clearer while wet, a no-sand kit will work. If the color stays with the lens wet, it is in the polycarbonate and abrasives are the only way out.
Does toothpaste work on headlights?
It is a very mild abrasive, so it will take the top off light surface haze and leave the lens unprotected. It cannot reach oxidation in the plastic, and it adds no UV layer at all, so whatever improvement you see fades quickly.
Should you put a ceramic coating on headlights after restoring them?
Yes, if the kit did not include a UV step, and it is worth doing even if it did. A ceramic or graphene spray on the lenses when you protect the paint is a thirty-second job that adds a sacrificial layer above the clear coat.

Keep reading

Receipts

Sources

We do not run a testing lab, and we do not pretend to. Where a measured number came from someone else's lab, we name them and link them. Where we could not verify something, we say so on the page rather than quietly leaving it out. Read our full method.